
Getting air into your drill’s oil system is not a situation any contractor wants to be in. It not only can damage your drill, but also leads to unwanted downtime. Prevent this from happening by filling your oil reservoir daily and ensuring it never runs dry.
If you are faced with the issue, here’s how to get your drill up and running again:
 1. Fill the oil reservoir.
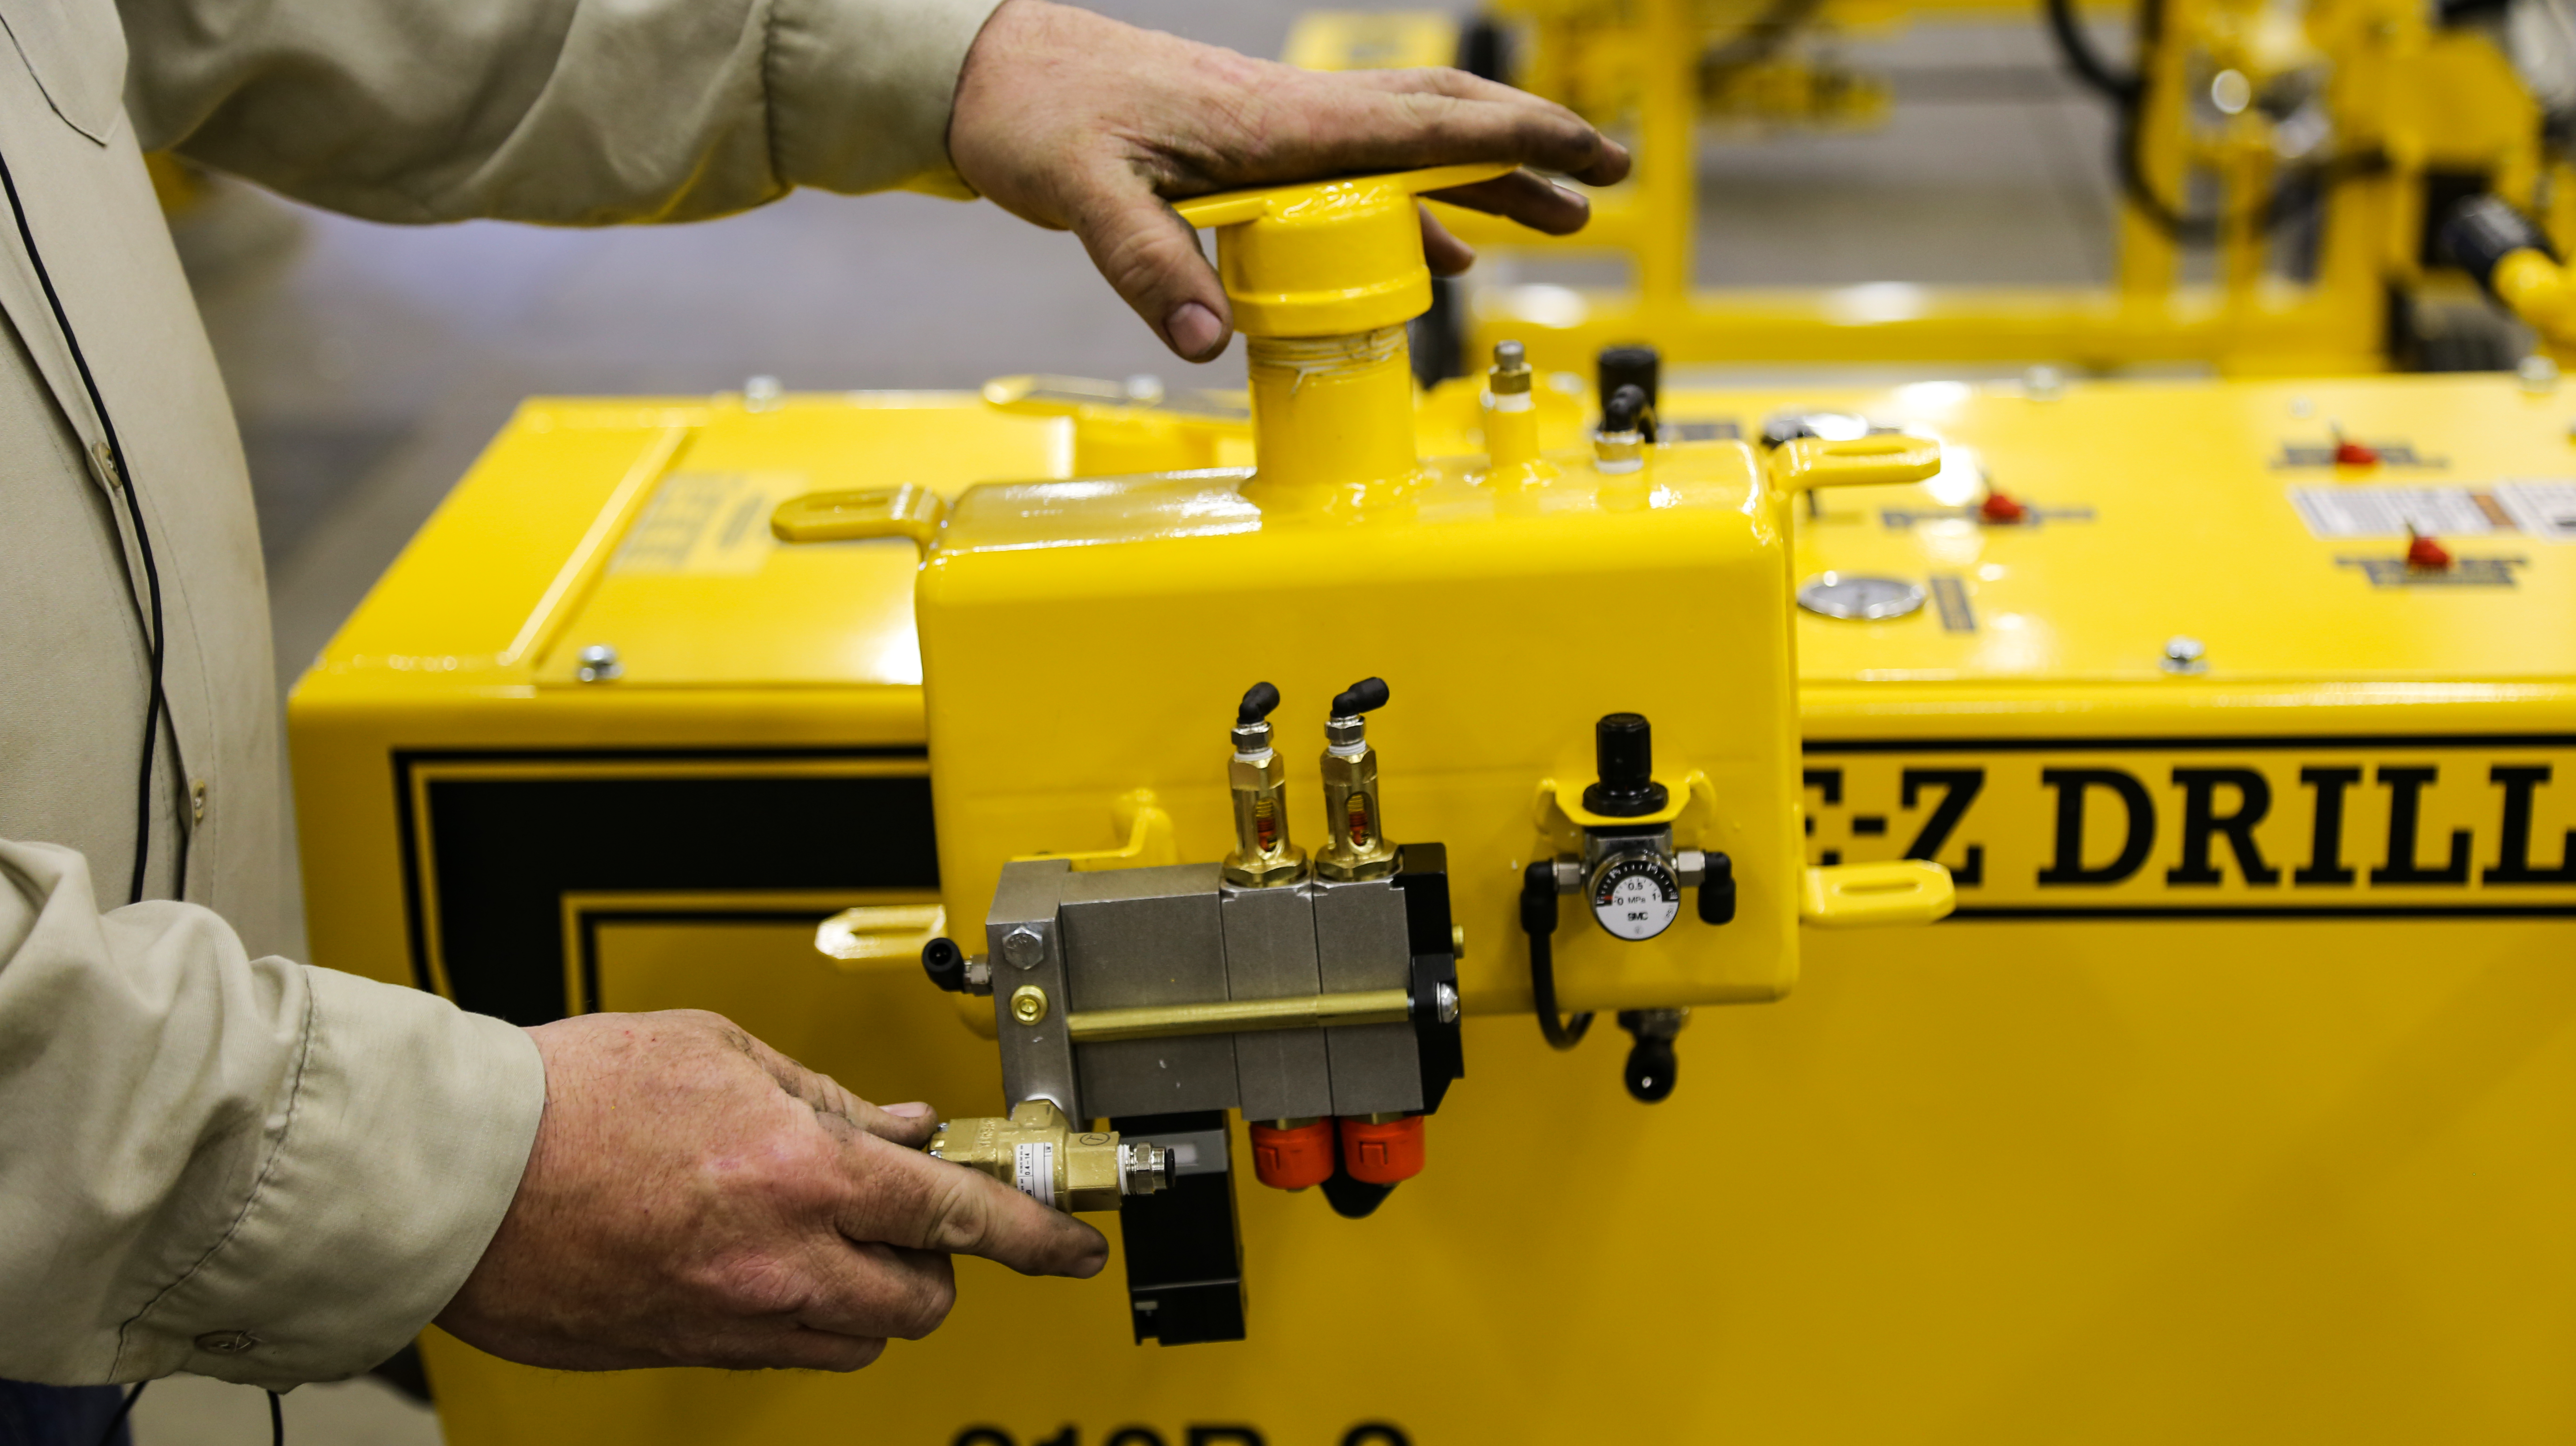
2. Connect the air supply and place rock drill levers in the positions shown to prevent the drill from powering on.
IMPORTANT: Place levers back in original position once system is working properly.
3. Turn the two power toggle switches to the “OFF” positions.
4. Adjust the pressure: Pull up on the regulator knob and turn it clockwise to 120 psi.
5. The red pistons in the site glasses will move up. Wait 30 to 60 seconds for air bubbles to move through the 1/8-inch clear lines to the pilot pressure valve.
6. Adjust the pressure: Turn the regulator to 50 psi. The red pistons in the site glasses will go back down.
7. Turn one of the power toggle switches to “ON.”
8. Turn the screw (or knob on older models) to increase the pulse frequency and allow all air bubbles to move into the pilot pressure valves.
9. Turn the power toggle switch to “OFF.”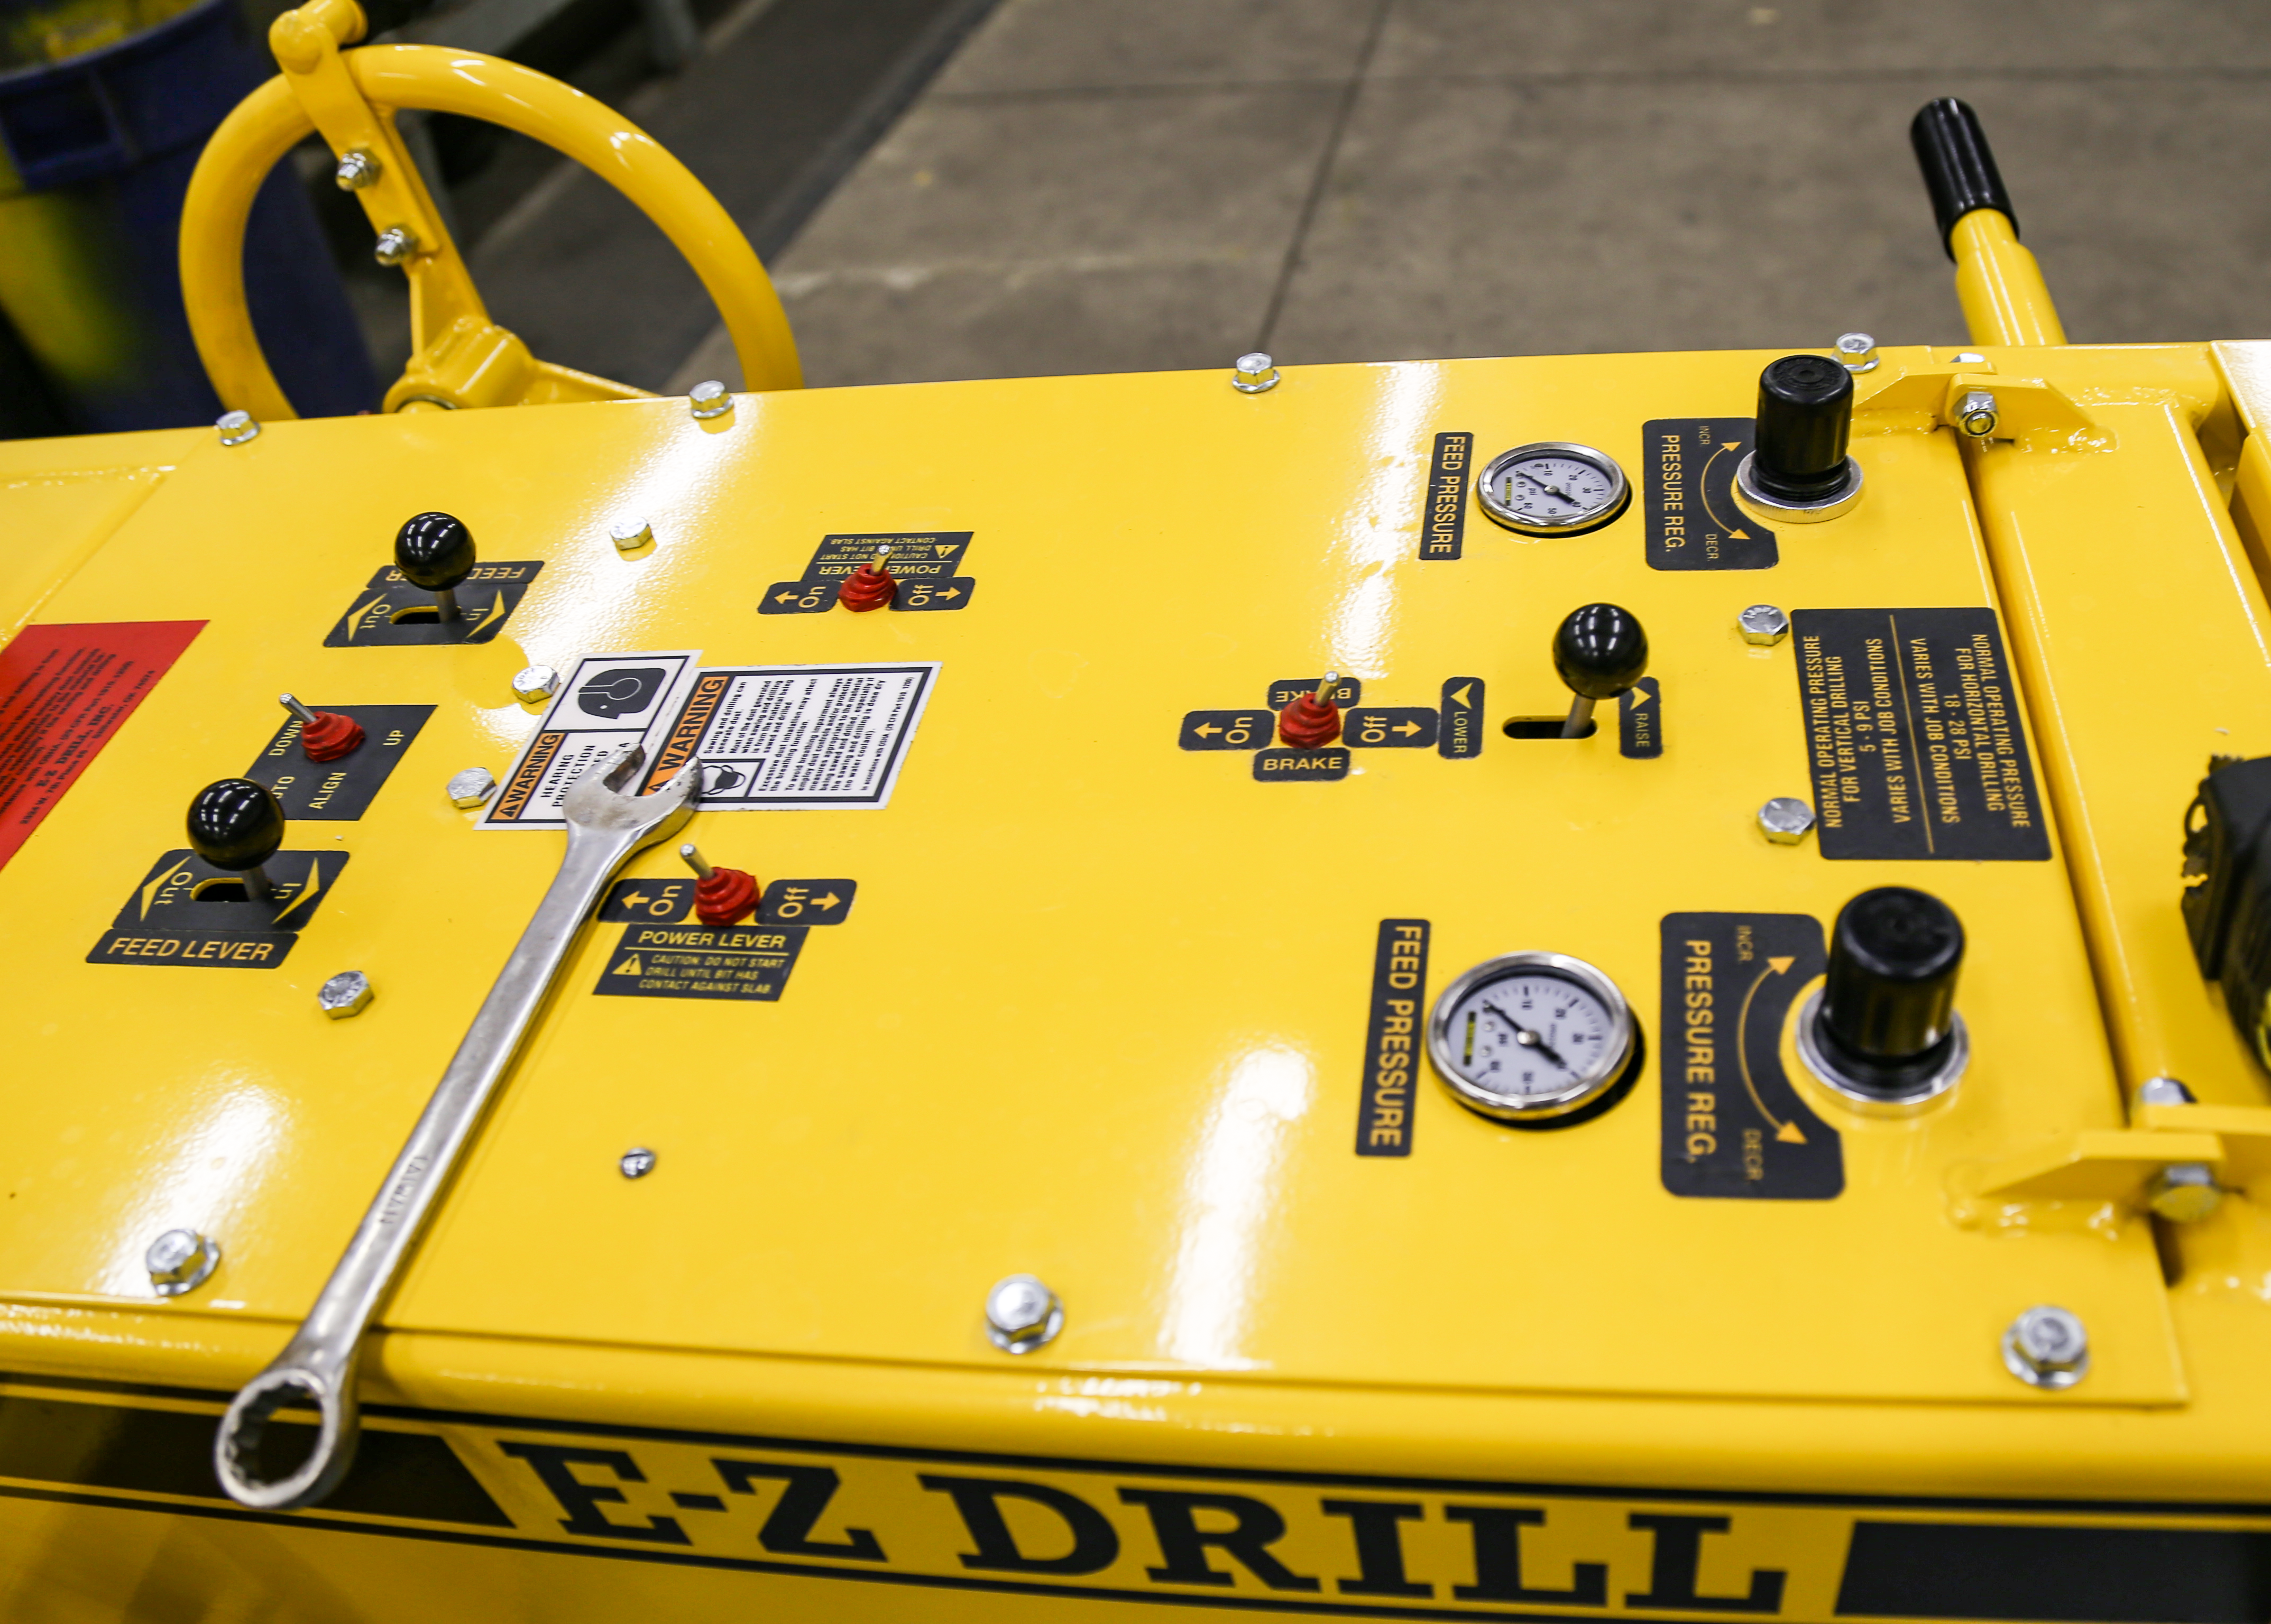
10. Turn the other power toggle switch to “ON” and repeat steps 8 and 9.
11. Continue to repeat steps 7 through 10 until all air bubbles have moved down to the pilot pressure valves.
12. Before turning the power toggle switch “OFF,” reduce pulse frequency to every 12 to 20 seconds
and allow the system to keep pulsing until all air
bubbles are removed.
13. Reset the oil tank regulator to 35 to 50 psi.
14. Turn both power toggle switches “OFF.”
15. Lower the control panel and replace screws.
16. Return levers to original position.
Still have questions about bleeding your oil system? Contact your local dealer or call 1-800-272-0121 or email us at sales@ezdrill.com
Visit our troubleshooting page for help with any other issues.
